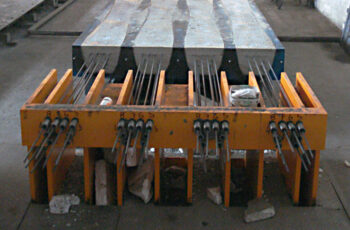
Building a shed is a rewarding DIY project, and choosing the right foundation is crucial for its longevity and stability. A concrete block foundation offers a robust and cost-effective solution, particularly for heavier sheds. This guide will walk you through the process of building a concrete block shed foundation.
Planning and Preparation
Before you begin, careful planning is essential. Measure your shed’s dimensions accurately and determine the number of concrete blocks needed. Consider the soil conditions on your site; you might need to adjust your plan based on whether you have clay, sandy, or rocky soil. You’ll also want to check local building codes and obtain any necessary permits. Consult this resource for permit information.
Choosing the Right Blocks
Concrete blocks come in various sizes and strengths. For a shed foundation, you’ll typically want 8-inch or 12-inch blocks, depending on the shed’s weight and your local regulations. Consider the frost line in your area; you’ll need to lay the blocks below the frost line to prevent heaving during winter. Learn more about frost depth in your region.
Site Preparation
Clear the area where your shed will be built, removing any vegetation, rocks, or debris. Level the ground using a shovel and rake. You might need to excavate the area to reach the appropriate depth for your foundation, especially if you need to account for the frost line. 
Laying the Foundation
Begin by laying out a perimeter using string and stakes. This will ensure your foundation is square and level. Start placing the concrete blocks, making sure they are level and aligned. Use a level and a rubber mallet to adjust the blocks as needed. Consider using a layer of gravel or compacted sand for better drainage. Find tips on proper block leveling here.
Adding Piers or Footings
For extra support, especially on unstable soil, you may want to add concrete piers or footings under the concrete blocks. This will distribute the weight of the shed more evenly and prevent settling. [IMAGE_2_HERE] Check out this guide on installing piers.
Connecting the Blocks
Once the perimeter is complete, you can connect the blocks using concrete mortar. Mix the mortar according to the manufacturer’s instructions and apply it to the edges of the blocks before placing them together. Ensure a strong bond between the blocks for stability. [IMAGE_3_HERE]
Finishing Touches
After the mortar has set (usually a day or two), you can add a layer of waterproofing membrane to protect the foundation from moisture. This is particularly helpful in areas with high humidity or rainfall. You can also consider adding a gravel or weed barrier around the foundation to prevent weed growth. See our article on shed waterproofing.
Conclusion
Building a concrete block foundation for your shed is a straightforward process that enhances its durability and longevity. With proper planning and execution, you can create a solid and reliable base for your shed, ensuring it withstands the test of time. Remember to always prioritize safety and follow building codes.
Frequently Asked Questions
What type of concrete blocks should I use? The best type of block depends on your shed’s weight and local climate. Consult your local building supply store for recommendations.
How deep should I dig for the foundation? You need to dig below the frost line in your area to prevent frost heave. Check with your local building department for the required depth.
Do I need a permit to build a shed? Permit requirements vary depending on your location and the size of your shed. Check with your local authorities before starting construction.
What tools do I need? You’ll need shovels, a level, a rubber mallet, a wheelbarrow, measuring tape, and possibly a concrete mixer.
How long does the concrete mortar take to dry? The drying time depends on weather conditions, but typically it takes 1 to 2 days for the mortar to fully set. More information on choosing mortar can be found here.

